Thursday, January 17, 2013

Peanut Blossom Cookies with HEART

We love Peanut Blossoms around here.  They are just plain YUM!!  Peanut butter.  Chocolate.  What's NOT to love?  Instead of topping your Peanut Blossom with a Hershey's Kiss, celebrate the season of love by using a heart shaped chocolate candy instead. 
 
This is Grandma Brown's recipe so it's tried and true and oh, so loved by everyone.  From our house to yours, we hope you and your missionary enjoy!
 
 
Peanut Blossom Cookies
1/2 cup shortening
1/2 cup peanut butter
1 egg
2 Tbs milk
1 tsp vanilla
1/2 cup white sugar
1/2 cup brown sugar
1/2 tsp salt
1 tsp baking soda
1 3/4 cup flour
48 chocolate candies, unwrapped
(like Hershey's kisses or hearts)


Combine all ingredients except the candy in a large bowl. (Yup, you heard right.  This is a 'dump and mix' recipe.  Love those!)  Mix on lowest speed of mixer until dough forms.  Shape dough into balls using a rounded teaspoon full for each. (I use a small scoop - Crestware 18/8.   It's about 1 1/4" across the bowl of the scoop.  Makes them the absolute perfect size for mailing in a can.)  Roll balls in white sugar to coat.  Place on ungreased cookie sheet (I line a cookie sheet with parchment paper so I don't have to wash it...I'm lazy like that).  Bake in a 350 degree oven for 10-12 minutes.  Top each cookie immediately with a candy kiss or other chocolate candy.  Press down firmly so the cookie cracks around the edges.
Never mailed cookies to your missionary before? 
You should really read 'A Word About Mailing Cookies' prior to baking. 


Happy Valentine's Day!

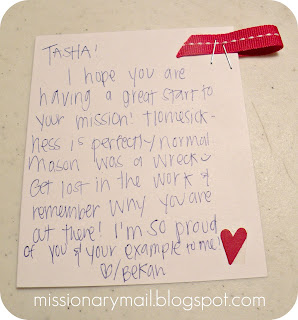
Valentine's Day is fast approaching so I thought I'd share what we sent to our missionaries and their companions last year.  (I had to save a FEW things so I'd have something to blog about after Mason came home, right?)
 
I had everything on hand for the "letter/craft" so I only needed to purchase the food items I was sending.  Overall a pretty inexpensive project and something a little different from a normal letter or email. The "letter/craft" was a little labor intensive but only because I was doing everything x4.  If you're only doing one for your missionary, you should be able to whip it up in a jiffy no problem.  If you're anything like me - time is totally an issue.
 
I found something similar to this last year on Pinterest, alas it is no longer there.  Have any of you ever lost multiple items that you've pinned.  Strange.  I would love to give credit where credit is due so if anyone has the link pinned somewhere, please drop me a line and let me know.  OK...hang onto your pants and jacket...here we GO!
 
 
Items needed:
lunch sacks
scissors
decorative scissors (optional)
glue stick or tape runner
cardstock (to match your project)
ribbon - wide (about 1" x 5")
ribbon - narrow (for pull tabs)
embellishments (optional)


Using an ordinary lunch sack, fold the bottom flap down.
 
 
Cut off the bottom flap along your fold line.  This will make your bag 'open' on both ends and when the sack is folded in half will give you "pockets" for your letters.
 
 
Trim the bottom and the top edge of the sack with decorative scissors if desired.  I desired 'cause I'm kind of a dork that way...God is in the details, right?
 
 
Fold the bag in half and glue along the two edges that weren't trimmed
thus creating your "pocket."
 
 
Now you're going to have to do a bit of math.  It's OK.  You're big.  You can handle it. 
Each sack will make at least three "pockets."  If you need space for more than three letters, then you will need an additional sack(s) which will actually give you four more "pockets" per extra sack - because the back side of the first sack and the front side of the second sack can now be glued along the edges becoming a fourth "pocket".  Still with me?
 
Once you've figured out how many sacks you need, stack them all neatly together and stitch them together using your sewing machine.  Don't worry...I needed 10 "pockets" (3 sacks) and my wimpy little sewing machine handled it just fine.
 
 
Now use a scrap of decorative ribbon and fold it over the seam edge and stitch in place.
 

Decorate.  Remember those details? 
 I just cut out a simple felt heart and used letter stamps to spell out L O V E.  Easy.
I'm sure yours will look much more beautiful.


Using white cardstock, cut to the size of the pocket. 
My lunch sacks were just the average, run-of-the-mill size.  I cut my note cards 3.75" x 4".
Using scraps of ribbon, staple "pull tabs" to the edge of each notecard.  Make sure that you gradate them so they are staggered as shown.  Embelish.
 
 
All done!  There, that wasn't too bad was it?  Way cute!


Wednesday, January 16, 2013

"Girlfriend? You need a business card!"

How often does your missionary come up in every day conversation? I mean seriously! What did I ever talk about BEFORE I had a missionary? Invariably I share my blog ideas and pick their brain for their ideas. I get so excited! I am really a nut about my missionary but it truly does make the time go by faster when I am thinking up ways to make their day brighter rather than thinking about how much I miss my little boy...
 
Personally, I think my blog title is a fairly simple one but I guess it can be quite a mouthful and might be a little tricky to remember all the way home from wherever we met soooooo...one day after repeating the title, then repeating it again, and then writing it down I thought, "Girlfriend? You need a business card." So here it is...
 
 
While watching the last General Conference on TV, a commercial came on for Vistaprint.com They make business cards and other business forms so I jotted down the web address and tossed it on the desk.  Today while going through the 'never-ending-plethora-of-miscellaneous-papers-that-seem-to-congregate-on-my-desk' pile, I came upon the web address.  Well, there's no time like the present (and in all honesty it distracted me from the 'never-ending-pile...')  The site was amazing and easy to navigate. There seemed to be millions of templates for any kind of business form you can imagine.  Each template is easy to manipulate with full editing capabilities and the price was awesome starting as low as $9.99 for 250 cards.  Need a new business card?  Here's a link for $5 off your order.  http://vistaprint.tellapal.com/a/clk/VTz21  Now...back to the pile.


Thursday, January 3, 2013

Heart Attack!


My current ward calling is Primary Chorister...it is also my all-time FAVORITE calling.  My Primary Pianist is currently serving a mission in Finland and the Primary kiddos have had so much fun sending "our" missionary bits of LOVE to show our support.

For Valentine's Day we sent her a "Heart Attack!"  So much fun and SO incredibly EASY.  I went to my local craft store and used their die-cut machine to cut out tons and TONS of hearts.  This is usually a free service but sometimes you have to buy the paper through the craft store in order to get it for "free" so you might want to check first.  When scrapbooking was all the rage, you used to have to sign up for a time slot but that hasn't been a requirement at my craft store for quite some time now.  Better safe than sorry...a few minutes on the phone could save you some pennies/dollars as well as time driving back and forth.  The paper that I brought with me was in a pad that had a variety of Valentine paper to choose from.  I just cut as many hearts as I could from each sheet of paper.  You can usually load the die-cut machine with 2-3 sheets at a time depending on how old (sharp) the die is.  Make sure that the paper is only one-sided so that you and the kiddos can write personal messages to your missionary on the other side.

In Primary* I passed out the hearts to the teachers and they used the very end of class-time to write letters or draw pictures to our cute Sister Luedtke.  At home I lined a small box (VHS size available at the Post Office) with tissue paper, put in our "Love Notes," filled in the spaces with loose Valentine candy, folded the tissue over and topped it all off with a cute note card.  See?  Told 'ya it was easy!

(click here to download the "Heart Attack" note card
with a slightly different font 'cause the original was having "issues")

*NOTE:  You don't have to be in Primary to make this care package be a huge hit.  Just take hearts to neighbors, friends and extended family and have them write personal messages to your missionary.