Sometimes these packages just make me giggle. I'm sure my missionaries just roll their eyes...and then chow down of course, because well, they're boys after all. I sent this with the camping 'photo book' from our family camp out to years ago...and we just returned from this year's camp out...yup, I'm that far behind on posting. Lame, I know. Matt loved it though and said they were super yummy. Don't know what the 'photo book' is? Click here for that post... On to s'mores, 'cause who doesn't love a good s'more?!
Materials Needed:
half-pint jars
mini marshmallows
graham crackers
chocolate candy bar or chocolate chips
Recipe:
1 1/2 cups graham cracker crumbs
1/4 cup melted butter
1 1/2 cups mini marshmallows
milk chocolate candy bar
(roughly chopped)
or use chocolate chips
Mix melted butter and graham cracker crumbs until well combined. Add 2 Tbs. of crumb mixture to the bottom of each jar. Add chocolate pieces to cover crumb mixture. Add mini marshmallows for the third layer. Repeat all three layers ending with marshmallows. Secure lid. (Yield: 5 half-pint jars)
Click here to download the jar topper and recipe card.
Make sure to line your box and wrap each jar in bubble wrap. I also included some red tissue paper and brown shredded paper - Matt said they got there just fine. Top it all off with the instruction card.
Don't forget to write a note on the back of the topper
if you're not including a letter or card...Why?
I didn't used to do this. I would send letters or I would send packages. Not usually both at the same time. I should clarify a bit: I send letters but to help them get more mail I didn't usually include a letter in with the package. The letter was always separate. In Matt's mission (and I think most missions that are stateside) all mail had to go through the mission home. I don't like it but I understand the reasons why so I'm ok with it. Letters would receive an address sticker and be forwarded immediately to the missionaries. Packages would stay in the office until the Zone Leaders came in weekly to pick up supplies or when the senior missionaries or mission president went to the area where they were. Here's the problem: When Matt arrived in his first area whoever typed the address into the computer typed it in wrong. For 30 days...his first 30 days in the field, Matt didn't receive one single stitch of mail. Nothing. Nada. Zilch...and we had NO IDEA until we started getting letters back 'return to sender'. Why does it take two days to receive a letter but 3+ weeks to get it back when it's not deliverable! It's a mystery...but Matt thought we just weren't writing. Just makes me tear up writing about it. He did receive one package. His 'greenie' package and on that one package, I had taken the time to write a note on the back of the package topper. He needed that. He needed that boost. He needed to know, right then, that we hadn't forgotten about him. From the moment I read that in his letter, I decided that I would always write a note in each package because you just never know when that might be the only mail they receive.
We have a tradition surrounding General Conference at our house: FOOD! A lot of our traditions revolve around food. It started out when our kids were quite young and I wanted them to enjoy Conference and stick around during the talks without having to resort to Satan's plan i.e. making them sit there. I make a big spread of assorted appetizers and have them in our great room and we just sort of graze all day long. It takes a bit of prep work but there's usually enough that it lasts the whole day and I don't have to worry about what's for dinner that night. I wanted to send Matt and his companion some kind of healthy Conference treats and while these probably weren't super healthy...there is after all, a ton of salt in Chex Mix...lets face it, it's a lot healthier than all the sugar I've sent the last few months...and Sister Murphy listed it as her favorite treat on her "My Favorite Things" printable. Her mom was kind enough to share the recipe and this helpful hint: "Double the sauce-ie bit of the recipe to make it truly addictive." Thanks, Marcie!
Chex Party Mix
3 cups Rice Chex cereal
3 cups Wheat Chex cereal
3 cups Corn Chex cereal
1 cup small pretzels
1 cup nuts
1 cup mini bagel chips
(like in Gardetto's - I found them by the deli at the grocery store)
1 cube butter
2 Tbs Worcestershire sauce
Tobasco sauce, to taste (optional)
1 1/2 tsp seasoned salt
3/4 tsp garlic powder
(or 3-4 fresh cloves garlic, crushed)
1/2 tsp onion powder
In a large bowl add the cereals, pretzels, nuts and bagel chips. Stir to combine.
In a microwave safe bowl melt the butter and add the seasonings. Stir to combine.
Pour over cereal mixture and stir until everything is coated evenly.
Spread evenly onto a baking sheet and bake uncovered for 1 hour in a 250 F. oven, stirring every 15 minutes.
This will allow the mix to dry out and become slightly golden.
Allow to cool completely. Store in an airtight container.
I may have mentioned this before: My husband LOVES sugar cookies - Grandma Christensen's recipe, thin and slightly crispy with frosting. Me? Well, IF I'm going to make them (which I rarely do because they take a freakishly LONG time from start to finish) then I like them thick and soft. We both agree on the frosting bit though...
I stumbled upon an egg cookie cutter and because of it's unique shape - small on one end and larger on the other - making these Easter sugar cookies wasn't too bad at all. I could use up most of the dough on the first roll out and with sugar cookies the less you roll the better because each roll out incorporates additional flour into your dough which effects the outcome of the cookie. Less is better, unless we're talking about frosting,...but I'm getting ahead of myself.
Grandma Christensen's Sugar Cookies
1/2 cup shortening
1/2 cup butter
3 cups sugar
4 eggs
1 Tbs vanilla
1 cup milk
7 3/4 cups flour
1 Tbs baking powder
1 1/2 tsp salt
1/2 tsp nutmeg
Cream shortening, butter, and sugar thoroughly. Add eggs one at a time beating well after each addition. Add vanilla to milk and beat into creamed mixture alternately with the sifted dry ingredients. Note: the dough may seem soft but don't add more flour). Cover or wrap in plastic wrap and store in the refrigerator overnight. Cut off a workable amount of chilled dough and place the remainder back in the refrigerator. Roll dough out on a lightly floured surface to 1/8 inch thickness. Cut into desired shapes. Place on greased or parchment lined baking sheet.
Bake at 400 F. 8-10 minutes or until lightly browned around the edges.
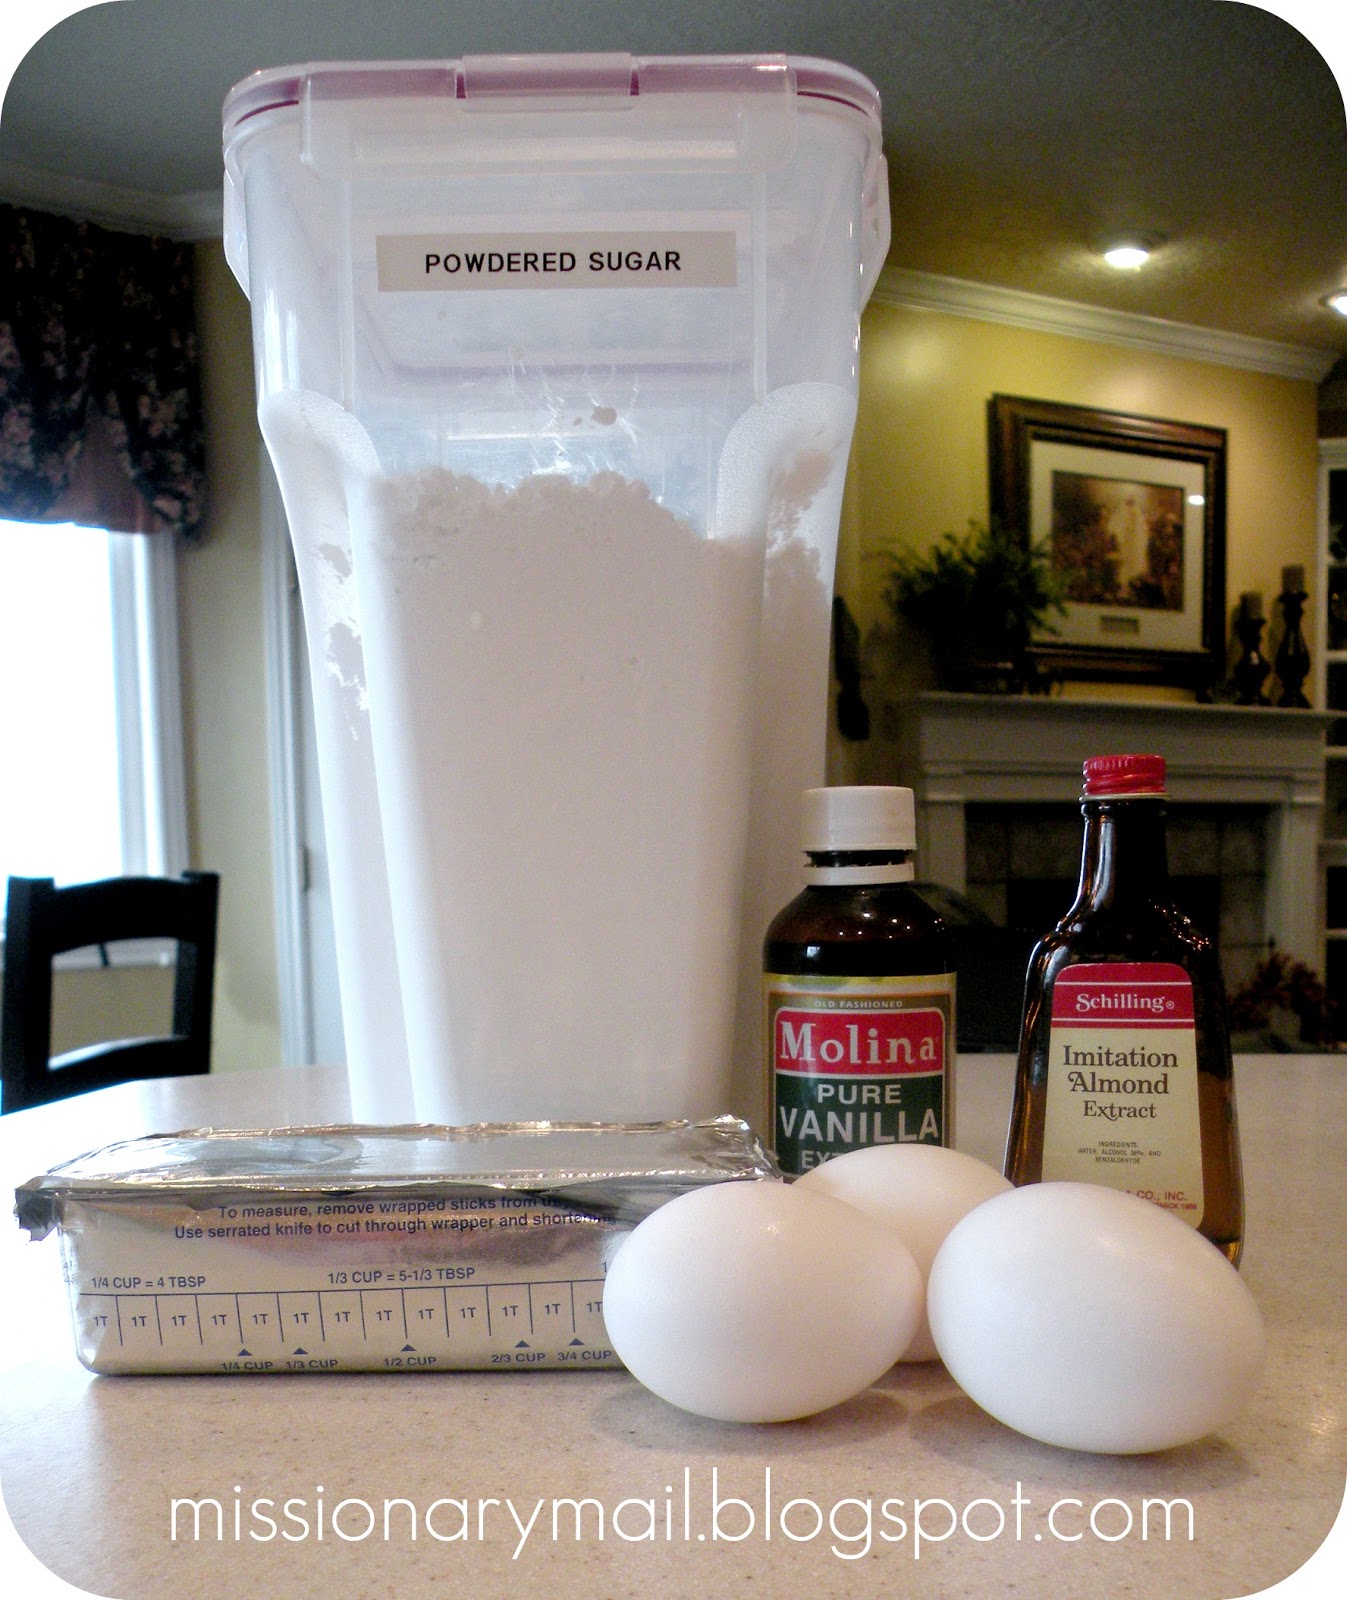
When cookies have cooled completely you can begin to decorate them. First you need to add your base layer. If we were just eating these at home I would most likely make a nice buttercream frosting. Because I need to mail them, and because I want to decorate them I like to use royal icing. It looks great; it's smooth; and it dries hard so I can wrap them and stack them. Here's the recipe that I like to use:
Royal Icing
1 cup water
6 Tbs meringue powder
1 tsp vanilla
1/2 tsp lemon extract
2 lb bag of powdered sugar
Mix the water and meringue powder in your mixer until it is foamy. Add the extracts and mix. Add the entire 2 lb bag of powdered sugar and mix on low until incorporated.
Mix on high until icing becomes stiff. Cover unused frosting with a damp towel
because it will harden SUPER FAST...
You will need different consistencies of icing for different types of frosting techniques. For piping words and detail, you will want the dough pretty stiff (like what you just made). For other techniques like floating, you will need to thin it out a little. You do this by adding more water, a teaspoon at a time. To test the consistency, make an indent in your frosting and count how long it takes for it to smooth out.
I used small squeeze bottles to decorate my cookies. One batch of the Royal Icing was perfect for the whole batch of Grandma Christensen's Sugar Cookies from the above recipe. First I decided on two base colors: pink and yellow. Using only a portion of the colored icing, I piped around the outer edge with a stiff icing. Then thinning the icing slightly, I filled in the center. Make sure to pop any bubbles that form with a toothpick. Gotta watch out for those bubbles. They are the enemy of a beautiful cookie. Do one cookie at a time and don't be discouraged. It really doesn't take too long for a simple cookie shape.
When your cookies are all frosted you are ready to move on to decorating. For this you want a stiff icing like you piped with at the beginning of the process. I chose quite a few different pastel colors and divided out my frosting. As you're mixing in your colors, be sure to stir each VERY well. Otherwise you may just end up with a colored streak...not pretty. Spoon each into squeeze bottles (or piping bags) and have yourself some FUN! I used a mug to hold each of my squeeze bottles. Just invert so the tip is pointing down inside the mug. It's easy to tell which color is in each bottle and the icing stays at the end of the tip which saves LOTS of time.
Make sure that the icing is completely hardened before you wrap them up to send to your missionary. I put mine into small cellophane bags, folded down the top, taped them closed with a cute piece of washi tape, and boxed them up in some boxes left over from my Christmas candy making. Add a bit of shredded paper and a cute bow and voila! All done. Your missionary and their companion will love them AND...your family gets to eat the leftovers...or your Visiting Teaching ladies...or your husband's Home Teaching families...or YOU!
For more ideas on mailing cookies, click here or here...
Exciting weekend around here...we received a FIVE PAGE letter from Elder Brown and a camera memory card. PHOTOS!!. Oh, happy day!! One of the things that he asked for was his winter things. Matt is a big time snowboarder so he has lots of cold weather gear and it seems that the temperature is dropping in Seattle and he's getting a bit chilly on a bike so during General Conference I whipped up this family favorite. Double batch. Some for him and his companion and some for us 'cause what's Conference without treats? Good thing it only comes around twice a year...
White Chocolate Chip Macadamia Nut Cookies
3/4 cup butter flavored Crisco
1 1/4 cup brown sugar
2 Tbs. milk
1 Tbs. vanilla
1 egg
1 3/4 cups flour
1 tsp. salt
3/4 tsp. baking soda
1 cup white chocolate chips
1/2 cup macadamia nuts, chopped
Heat oven to 375 F. Combine Crisco, brown sugar, milk, and vanilla. Beat egg into creamed mixture. Combine flour, salt and baking soda into mixture. Add nuts and white chocolate chips. Bake for 8 minutes. Makes about 2 1/2 dozen.
Matt loves brownies. He used to make two batches almost every Sunday. One tray for us and one tray for his Scoutmaster. His Scoutmaster was trying to get him to finish off the last requirement for Matt's last merit badge so he could get his Eagle and thought that having to make brownies every week would be the deal-breaker and he'd get 'er done. Yeah, whatever. Matt loves brownies and enjoys cooking so it wasn't really a punishment BUT we did get treats every Sunday.
Yesterday I was looking around on Pinterest for a new cookie recipe to try for Matt and when I stumbled upon this little gem, I knew it was just perfect. This Brownie Cookie recipe comes from Pure & Yummy (pureandyummy.com) and is oh, so yummy. I love how they stay soft and chewy in the center but the outside edges get slightly crispy just like the 'big' brownies do. Side note: You know how when you're taking brownies or lemon bars over to someone's house and you cut off all the edges so you can take just the nice looking center cuts to the neighbor's? I tell my kids it's because it makes them look nicer on the tray but that's not really it...I want to eat all the edges myself. The truth comes out. Good thing my kids don't read my blog, eh?
Chop the unsweetened chocolate into pieces. You can leave this on the paper that it comes wrapped in (the inner one not the outer packaging - grin) and just chop away. Then carefully lift the paper off and slide everything into your pan.
Combine butter, unsweetened chocolate, and 1 1/2 cups chocolate chips in a heavy saucepan. Cook over low heat, stirring constantly, until butter and chocolate melt. Chocolate burns easily so don't get excited and try doing this over high heat or walk off to answer the phone. You could probably do this step in the microwave. Start out with one minute on high, then remove and stir and continue heating in 30 second increments, stirring in between until mixture is entirely melted and smooth. Let cool completely.
Combine flour, baking powder, and salt in a small bowl. Set aside. Beat eggs, sugar and vanilla at medium speed with an electric mixer. Gradually add dry ingredients to the egg mixture, beating well. Add chocolate mixture and beat well. Make sure that your chocolate mixture is completely cool or your batter will be really thin. IF you got a little excited and added the chocolate before it was totally cool, don't worry. It will still work, just stick it in the fridge or let it sit on the counter for a bit. As the chocolate starts to set up again, your batter will thicken. Stir in the remaining 1 1/2 cups chocolate chips. If your batter still seems a little thin, do NOT add extra flour. They will be just fine. I promise. You could stick your batter in the fridge for a bit if it's driving you crazy but you might need to adjust the cooking time.
*Scoop dough onto baking sheets one inch apart. (I like to line my cookie sheets with parchment paper. You can use the same piece of paper for the whole batch of cookies. Don't change the paper every time. The cookies come off the paper really easy and when you're finished, you just wad up the paper keeping the crumbs inside and stick it in the garbage. The biggest perk is...you don't have to wash your cookie sheet! Yay! It doesn't take much to get me excited around here, does it?...sad.) Bake at 350 F for 10 minutes. Cool slightly on baking sheets; remove to wire racks to cool completely.
*I like to use a small scoop for my cookies. Baked cookies will measure about 2 inches.
So, now a bit about packaging:
I still love sending cookies in the decorated Pringle's cans...but...is it just me?...or does it make you a little crazy that each mission is different? With Mason I could call the mission home the day after transfers and see if he had moved and they would give me his new companion's name and his new address and I ALWAYS mailed his mail AND packages straight to his apartment. Yeah. Matt's mission is different. Everything. EVERYTHING has to go through the mission home. Mail. Packages. Everything. So I called the mission home and the cute little old sister missionary informed me that she is very good at forwarding every single stitch of mail the following day to the missionaries. Packages however, get to sit at the mission home until the Zone Leaders come in to pick them up which is about once a month. ONCE A MONTH?!?! Grrrrrr...... (Hang in there with me. My rampage is just about over and there will be a happy ending...) So because of all that other "stuff" I've changed how I mail some of my packages. Cookies being one of them.
When I called the mission home, the cute sister lady mentioned to me that the post office WILL forward the 'small flat rate' boxes (the ones that are about the size of the old VHS tapes) but they WON'T forward anything larger than that. So I've started to send a lot of smaller packages instead so Matt will get them faster. An added perk is that they only cost $5.80 to mail. Yup. Jeff's smilin' at that one! Here's how I do it:
Line your box with tissue paper. Fold it so it will fit nicely which not only looks better but will also give your cookies a little extra padding. Place some packing material around the outside edges with maybe a little on the bottom. You won't need much on the bottom because your syran wrap around the cookies will be folded underneath. You'll see. Read on...
Take two cookies and place them flat sides together.
Using a square of syran wrap, roll the cookies up then tuck the ends under. You could tuck one under and wrap the other end over but that wouldn't look as good and I'm into aesthetics...either that or I have OCD. Probably the later...
Place the cookies in the box. You should have room for six two-packs or one dozen cookies. Because each box was so inexpensive to mail, I just mailed Matt's companion his very own box. What missionary needs more than a dozen cookies at a time? Place some more packing material over the top and in-between each cookie pack, then put in a letter. Here's why...
When Matt arrived in the mission field, he was assigned a companion and they were sent to a brand new area. No investigators. No records. Nada. Their apartment wasn't even ready yet so they spent the first week on the floor of the Zone Leaders' apartment. We at home, are busy sending lots of letters and packages. (Hey, I served a mission. I remember vividly just how hard the first bit is. Letters/packages from home keep your spirit's up and remind you that you are not alone nor forgotten.) We had sent one large package to Matt and one large package to his companion. (click here for the Greenie Package and here for the Missionary Trainer Survival Kit) One month later we found out that neither of these missionary's were receiving any mail. The mission home had their new address wrong! All of their mail was being forwarded and then 'returned to sender' because of a wrong address. I can't even imagine going that long without anything from home. The only thing that they had received were the two large packages that I had mailed to each of them because they couldn't be forwarded and had to wait for the Zone Leaders to pick up and personally deliver. Here's where the letter comes in...When Mason was on his mission I never, ever included a letter in his packages. I always included a cute little package topper and jotted a few lines on the back but that was it. Never a letter. That was reserved for another piece of mail. Gotta' spread out the love, if you know what I mean. This time. This ONE time, I actually wrote a letter. Three pages. I did not know at the time that this would be the only actual letter that Matt would receive for over thirty days, but someone did. I am so grateful that I included a letter with that package. Now I always include a letter. It's not three pages every time, but it's important, so I do it. I encourage you to as well...
Sorry...I'm very long-winded on this one aren't I?
Fold the tissue over the cookies and place your topper on top. I couldn't provide a printable for you this time because I'm sure that "Cookie Monster" is copyrighted and they are probably just 'big' enough to take it personally but it was really easy to do and you could easily make your own. Just Google 'Cookie Monster' and cut and paste one into your document. Easy peasy and oh, so cute! Enjoy and I hope your missionary never, ever has to go a whole month without mail. On a side note: Matt did receive emails just not 'snail mail.'
My daughter Maren and I went to a Silver Beaver award ceremony for my dear friend, Janice last week and following the event we stopped in at Kneaders Bakery for a little treat. They had the most adorable shamrock sugar cookies ever! The next day after work I popped in to my very favorite little kitchen store, Gygi's in Salt Lake City and picked up my own shamrock cookie cutter and a decorating tip to pipe the edges of the cookies.
I should mention here that I don't actually like to make sugar cookies. They take a ton of time! You've got to make the dough. Chill the dough. Roll out the dough. Cut the dough. Cook the dough...repeat that whole process a gazillion times and then you have to get to frost them. Makes me tired just thinking about it. Yeah, we only make sugar cookies around here on Christmas Eve and that's only because it's Jeff's family tradition. At the end of this post I'll tell you about one of the best Christmas gifts I ever received.
Have I scared you away yet? Hang in there. It'll be worth it. Life changing in fact, like when I told you about frosting cupcakes. Yup, that good.
Normally...ok, the one and only time each year that I make sugar cookies, I frost them with the Best Ever Buttercream Frosting (really, that's the name). While it actually is the best ever and while it does set up ever so slightly I didn't think it would travel very well and the frosting would get smooshed in transit and why work so hard if they aren't going to look fantastic, right? With the help of the oh so kind employees at Kneaders they walked/talked me through the easiest way ever to frost sugar cookies. I looked up some recipes online and with my son Connorton as my official taste tester, we've got this all figured out for you.
Let's start with the sugar cookie recipe:
Nicole's Sugar Cookies
1/2 cup butter, has to be the real stuff
1/2 cup shortening
1 cup sugar
3 eggs
3 1/2 cup flour
1 tsp baking soda
2 tsp cream of tarter
1 1/2 tsp vanilla
Cream the butter and the shortening. Add the sugar and mix. Add the eggs and mix just until the eggs are blended in. Add the soda, cream of tarter and vanilla but mix just until blended - you don't want to over mix once the eggs are in. Add the flour. The recipe calls for 3 1/2 cups but you will need more than that. The key to keeping the cookies soft is adding enough flour. Add the 3 1/2 cups (one cup at a time and mixing after each addition), then use your fingers to determine how much more to add. It will be different every time you make them because your eggs will never be the same size. Pinch the dough. If it is sticky and you can pinch through it easily, you do not have enough flour. You want the dough to be soft, but not really sticky. You want to have some substance to it. Just keep adding 1/2 cup of flour, mix and pinch until it is just right. Chill the dough for at least 2 hours. Roll out to 1/4 to 1/2 inch thick. Cut into shapes and bake at 350 for 8 minutes. They are not going to look like they are done yet but take them out anyway. Be careful when transferring to rack or other cooling surface they will be really soft. As they cool they will become easier to handle.
Cool completely and frost.
This recipe is from my friend Nicole who knows that I don't like to make sugar cookies and knows that they are Jeff's favorite (his very favorite are Pumpkin Chocolate Chip...yeah, I don't make those either) so every time she makes a batch she shares with him. I have really great friends. Jeff's bookkeeper makes him Pumpkin cookies so don't feel too badly for him.
Tips & Tricks:
1. These are a few of my favorite cooking tools:
My rolling pin - I love it. It is long and has no handles. I have the other kind but I never, ever use them. I've had this one since I got married and my kids will probably fight over it when I'm gone. Never soak them in water. Just wipe them clean with a damp cloth. Mine is wood but they have a composite one at Gygi's that is very affordable.
Mini-spatula - I love these. Came from Gygi's, of course. They are very inexpensive - usually .99 - and are the perfect size for dishing up little desserts, cookies and bars - 2 1/4" wide. In this case I used it to help me lift the sugar cookies off the counter. Dip it in flour to prevent dough sticking.
Scraper - I use this tool all the time. It's a great tool for dividing dough and scraping clean your kitchen counter (see figure 3)
2. Dip your cookie cutter into flour in between each cutting and your dough will never stick to the cookie cutter. When lifting the cut cookie off the counter, dip your spatula into flour and press down on the counter while inserting under the dough. Dough will not become misshapen and will easily slide off spatula and onto the baking tray.
3. As I mentioned above: Clean up is made much easier with this handy little scraper. They have one similar to mine at Gygi's - usually .99. Scrape the flour and cookie dough gunk from the counter and sweep right into the garbage. Wipe counter down with a damp cloth and you're good to go.
Jeff always says: "Right tool for the right job." He's a smart man.
On to the frosting!
This is life-changing...
Vanilla Dipping Frosting
6 cups powdered sugar
1/2 cup water
2 Tbs light corn syrup
1 tsp vanilla
In a saucepan, combine powdered sugar, water and corn syrup. Cook over low heat, stirring constantly, until it reaches a temperature of 92 degrees F (33 degrees C). Mixture should be thin enough to pour, but thick enough to coat the cookie. Do NOT let the temperature get over 100 degrees F or the icing will not dry shiny. Dip the baked and cooled cookie in the icing. Lay the cookies out single until icing is dry. IF it does go above the 92 degrees F, do NOT throw it away. It just won't be shiny but it will still taste great. It's all good.
I used the Vanilla Dipping Frosting to frost the tops of the cookies. So FAST!! Just hold onto the sides of the cookie and dip the top into the frosting, lift the cookie up and let some of the excess drip off then flip it over onto a cookie sheet to dry. This frosting dries really quickly so I did find that I needed to give it a quick stir prior to dipping each cookie and once or twice I needed to turn the element back on and warm it back up slightly to keep it the consistency that I wanted. This will dry hard to the touch but not as hard as royal frosting and it won't break into bits when you bite into it. I was able to frost the entire batch of 48 cookies in just a matter of minutes with not much frosting left over. I just left the frosting white - mostly because it didn't even occur to me to add color to it but it would be totally darling to have it tinted a light green then pipe with a little darker green. Cute!
Now for the piping frosting...
Cutout Cookie Icing
3 egg whites, room temperature*
Whip for 2 minutes at fast speed until stiff
Add:
1/2 tsp almond extract
1 tsp vanilla
4 cups (1 lb) powdered sugar
Mix all together.
Add:
2 Tbs shortening
coloring, if desired
Mix on low speed until smooth. If you want to make a glaze from this,
just add a little hot water. This frosting dries firm to the touch but again it is not as hard as royal frosting. It's pretty and tasty and it dries very quickly so you can stack the cookies.
Keep the frosting stiff if you plan on using it for piping.
You can also use this to frost your cookies but it won't be as fast as the dipping frosting.
*Room temperature eggs: If you forget to get them out of the fridge in time for them to come to room temperature, just put them into a bowl of hot water for a few minutes.
Let's get piping!! This may look a bit intimidating if you've never done it before but it's really not bad at all. Just practice on a cookie or on a bit of parchment paper or wax paper...or a plate. You'll be fine. Promise.
First we need to load our bag with frosting:
I like to use a disposable pastry bag because I'm really pretty lazy about some things. You will need to fit your decorating tip into the bag to see where you need to snip the end off. Snip it off then insert your coupler inside, place the tip over the coupler but on the outside of the bag, screw the ring in place. Fold down the top of the bag ('cause we don't want to make too big of a mess).
Hold the bag with your hand (shown at left) and load frosting by the spoonful. Use the thumb that is holding the bag to scrape the frosting from the spoon. You can fill this pretty full just make sure that you leave enough head space so you can twist the top closed.
When you've loaded the frosting into the bag, fold the top back up and use your fingers to work the frosting down into the end of the bag (shown at left).
Twist the top and hold. You will keep your hand on this twist while decorating. Occasionally untwist and work the frosting down into the end again. Refill when necessary.
Cute!! I've included a little video clip of how I piped the frosting on. It really went pretty fast once I got the hang of it which didn't take too long. Let them dry completely then wrap them individually in syran wrap to insure freshness.
So, assuming that you're still with me...here's the story of one of the best Christmas gifts I've ever received. I work outside the home. It's only part time but that's how we support our missionaries and it is what it is and most of the time it works out pretty well but occasionally (sometimes more often than that) I get a little stressed...or a lot. This year I had to work on Christmas Eve. Yeah. Mom's don't have anything to do on Christmas Eve do they? I thought I was doing pretty well getting done early what could be done early but some things just can't be done too early. One of those things was making sugar cookies with the kids for them to leave out for Santa. Jeff's family tradition. Jeff and I work at the same place and late in the afternoon on Christmas Eve he called me into his office and presented me with a gift from Mike (one of the other accountants) and his wife Nicole. A beautifully decorated clear box - it was a Sugar Cookie Kit!!! Full of Nicole's fresh baked sugar cookies (recipe above), red and green frosting (yup, you guessed it...her Best Frosting Ever recipe) and cookie sprinkles. I cried. Seriously. The weight that that gesture took off my shoulders was incredible. I'm crying again just thinking about it. The best gifts come from the heart. Thanks, Nicole...and I hope that you don't mind that I just posted your two favorite recipes all over the internet! Oh, and here's her frosting recipe!
I wanted to have some kind of treat for those coming over to the house for Matt's 'Grand Opening' of his mission call so I came up with these yummy Grasshopper Cupcakes. I've never made the 'fancy' kind of cupcakes before but I wanted to come up with something that would not only taste great but look amazing as well...and, well...Matt has a pretty serious sweet tooth. While browsing at Orson Gygi's in Salt Lake City with my dear friend and former mission companion Marcie, I noticed a box of Andie's Mints. My imagination was sparked! I purchased a box of disposable pastry bags and the proper tip for the look that I wanted to achieve. Devil's Food cupcake with chocolate ganache (pronounced guh-nahsh), mint buttercream frosting topped with an Andie's Mint...oh my! They actually turned out to be very easy and now I'm kinda' hooked on the whole cupcake thing and thinking up other concoctions and combinations and trying to figure out just how I can send them through the mail without them arriving smooshed and not so pretty. I'll give it some serious thought and let you know when I've got it all figured out. Any ideas?
Follow directions on the packaged cake mix. When making the cupcakes, don't fill the baking cups as full as you normally would. Maybe only 2/3's full or less. I haven't made cupcakes in quite some time and forgot this essential step. Consequently, I had to make a lot more and my cupcakes don't look as pretty because you can see the actual cake rising above the wrapper. I had to make quite a few (about 70...remember all those nieces and nephews that I occasionally mention?) so remembering this little step would have saved me some precious time and money. Live and learn, right? While your cupcakes are cooling, make the chocolate Ganache.
Note: Sorry I forgot to take photos...whatever was I thinking?
Chocolate Ganache
8 oz. semi-sweet baking chocolate
(not chocolate chips)
1 cup whipping cream
2 tsp vanilla
powdered sugar, to taste
Break up the chocolate into a saucepan, add the cream, and stir over moderate heat until the chocolate has melted and the cream is almost at a simmer. Stir quite vigorously (I use a wire whisk) until the chocolate and cream have melded together into a smooth brown mass. Stir in the vanilla and powdered sugar to taste. Turn the chocolate into a mixing bowl; set bowl in a larger bowl of ice and whisk several minutes until the ganache has firmed to spreading consistency. May be made ahead, but don't bother to beat it over the ice; reheat to decongeal to proper consistency before using and then beat over ice if necessary. This should look like a thick, dark chocolate frosting.
Note: Ganache is French (gah-nahsh) and is a rich mixture of chocolate and cream
generally used for a frosting or filling.
When cupcakes have cooled completely, frost them with a layer of the chocolate ganache. This doesn't have to be piped on. Just frost using a butter knife or a small offset spatula. Doesn't have to be fancy. You will be covering it up with the Buttercream Frosting. (see above - definately not fancy)
Buttercream Frosting
1 cup butter
3 Tbs. milk
4 cups powdered sugar
flavoring to taste
green food coloring
Cream butter. Add milk and powdered sugar one cup at a time. Continue to add sugar until desired consistency. Make it a little thicker than you normally would as you will be adding flavoring and coloring and that will thin it down somewhat. You also want it to hold a really nice, stiff peak when piping onto the cupcakes.
Make the Buttercream frosting and...just a warning, you will need LOTS! One batch frosted almost a dozen cupcakes. It's on there pretty thick so if you just want to frost them like you usually do you could get by with one batch of frosting easy. On the other hand...they sure are fancy and a LOT faster to frost using the decorator tip and disposable bag shown above. If you're using the disposable bags you will need to purchase at least the 16 inch size. I got the 18 inch. That way each bag will hold an entire batch of Buttercream frosting and still allow room to twist the top and apply pressure without having the frosting squish out the top of the bag. Yeah, that would not be good. When it's time to refill your bag, just fold the top down again and refill as before; unfold the top, twist and squeeze frosting into your tip and you're good to go.
I used the largest open star tip that Gygi's had - Ateco #826 (they were out of the Wilton but you can click on the link to see what it looks like and find one comparable to use). You will NOT need a coupler for the extra large tip that I used. Just slide your tip inside your disposable pastry bag and note where the end needs to be clipped off. Take out the tip, cut the bag and reinsert tip and slide down until it's snug at the bottom. Fold down the top of the bag and holding with one hand, load your frosting inside. Unfold the top portion of the bag, twist and apply pressure until the frosting fills the decorative tip.
Figure #1:
Start at the outside edge of your cupcake
Figure #2:
Continue around the entire circumference
Figure #3:
When you are back at the beginning keep applying pressure and do a smaller circle on the inside
Figure #4:
Top with an Andie's Mint
Hmmm...I wonder what I would have made
had Marcie and her daughter not taken that cake decorating class?
We love Peanut Blossoms around here. They are just plain YUM!! Peanut butter. Chocolate. What's NOT to love? Instead of topping your Peanut Blossom with a Hershey's Kiss, celebrate the season of love by using a heart shaped chocolate candy instead.
This is Grandma Brown's recipe so it's tried and true and oh, so loved by everyone. From our house to yours, we hope you and your missionary enjoy!
Combine all ingredients except the candy in a large bowl. (Yup, you heard right. This is a 'dump and mix' recipe. Love those!) Mix on lowest speed of mixer until dough forms. Shape dough into balls using a rounded teaspoon full for each. (I use a small scoop - Crestware 18/8. It's about 1 1/4" across the bowl of the scoop. Makes them the absolute perfect size for mailing in a can.) Roll balls in white sugar to coat. Place on ungreased cookie sheet (I line a cookie sheet with parchment paper so I don't have to wash it...I'm lazy like that). Bake in a 350 degree oven for 10-12 minutes. Top each cookie immediately with a candy kiss or other chocolate candy. Press down firmly so the cookie cracks around the edges.
Dear Reader: My wholehearted apologies...I started this post ages ago and thought I had posted it. Alas, I had not. I am a slacker! Slap me silly with a wet, soggy noodle and consider yourself way ahead of the game with tons of ideas for NEXT year's 4th of July festivities.
The kids helped me get a 4th of July package together for our missionaries - my son, his girlfriend and my parents. Wow! I can't believe it's July already. Mason comes home in just a few very short weeks. We are so excited around here...but also just a little sad. I will miss having a missionary BUT we still have my parents and his "friend that's a girl but not his girlfriend" so I will still try my best to come up with creative, fun package and letter ideas.
This one is oh, so easy to pull together. Red, white and blue everything. Grab some festive patterned or plain paper/card stock and some coordinating tissue paper and you're good to go.
...is that enough to get your creative juices flowing?
Firecracker Cookies:
I found the recipe for these delicious cookies on Pinterest (of course!) from the Cookin' Cowgirl. They were so easy to whip up and look so festive for the holiday. The recipe calls for an 18.25 oz. box of cake mix. I don't know about your local grocer but mine only carries the 15.25 oz. size. I added an extra 1/4 cup flour and they turned out just perfect. The recipe also calls for lots and lots of sprinkles that are added to the cookie batter. Each container was $2.49...yikes!! And I needed 6 of them because I was making a double batch. I grabbed two and headed to the bakery to see if they had any that I could buy. They had a mix of red, white and blue stars. One cup for .99 ...score!!
Firecracker Cookies:
1 box French Vanilla cake mix
(18.25 oz. size or 15.25 oz. and 1/4 cup flour)
1 tsp baking powder
2 eggs
1/2 cup vegetable oil
1/2 tsp vanilla extract
1/2 cup red sprinkles
1/2 cup blue sprinkles
Preheat oven to 350 degrees. In a large bowl, mix together cake mix and baking powder. In another bowl, mix together eggs, oil and vanilla. Combine mixtures and blend. Stir in the sprinkles and drop by rounded teaspoon or small cookie scoop* onto a greased or parchment lined cookie sheet. Bake for 10 minutes. Remove from oven and let cool completely. Place inside a clean Pringle's potato chip canister that you have covered in colored/patterned paper. Reseal.
*I use a #60 scoop (the higher the number the smaller the scoop)