After Christmas I stumbled upon a large bag of red and green M&M's on clearance at the grocery store. I came home and separated out all of the red from the green. The red one's I included in Matt's Valentine's package and the green I saved for St. Patrick's Day.
(Yeah, I know the purple and green don't really match but I couldn't resist...it's SPRING!!)
Using a poem that I found on Crazy Little Projects(click here for the link) I whipped up this little sandwich bag topper and filled the bag with the green M&M's and some Rolo's. It would work with any kind of candy that are green or gold. Just the gold Rolo's would be so funny!
I included our messages that we wrote at our last Bash for our family missionaries (click here for the post), some green cookies (Thanks, Tonya!) and this Irish Blessing for the package topper. Simple.
We had our family Bash recently and I had all the cousins write short notes to our family missionaries. I tend to get better participation if I keep things quick and simple. Too complicated or time consuming and their eyes tend to glaze over. I found these cute St. Patrick's Day lunch box notes from Heather at The Chickabug Blog(click here for the free printable*) that worked perfectly. Some of them even have a question or wording on the top for those who can't think up something to write.
I wanted to put all the notes (there was quite a pile of them) into a small vellum envelope but I didn't have any on hand so I made my own out of waxed paper. Not the perfect solution but I didn't have to go to the store. Free is always better...just ask my husband. After cutting out the envelopes, I closed them with a bit of Washi tape. Cute. Free. Easy. Winner, winner, chicken dinner!!
I'm back! ... but my boy is gone. Bittersweet, isn't it? Matt oops! Elder Brown arrived in Seattle last week. He is in a new area with no investigators and he's loving every minute of it.
Greenie /gree-nee/ n : An unofficial term used by missionaries of
The Church of Jesus Christ of Latter-Day Saints
to describe the status of 'new' missionaries to the mission field.
Just like when my first served his mission - when I'm feeling sad I entertain myself by thinking up packages to brighten my missionary's day. I wanted to send him a "Greenie" package. There are a lot of ideas out there on the internet. I mean a LOT! If you want to send your missionary a fun and quirky "Greenie" package just Google it and give your creativity a jump start. For this package though, I opted for "spiritual."
I don't normally send very many "spiritual" packages. Most of the time I try to just send fun things. I figure they get LOTS of "spiritual" out there. BUT...new missionaries are on a spiritual high. They are just getting into the field and just starting to understand the work and the effort it takes. I wanted Matt to remember some of the counsel that has been given to us through the scriptures and feel buoyed up by it. I wanted him to remember that he is not alone in this great work.
I tried to think back to my mission days and the things that I could have used some help with, then I found a scripture on that topic and then something to go with it. The color scheme was already a given...GREEN!!... and I wanted to keep the style simple so as to not detract from the scripture so I just printed the scriptures on white cardstock, cut them out and then tied them together with cute stripy string. Easy. At the bottom of the package I put the framed scripture. I plan on sending new scriptures or quotes occasionally and Matt can just change out the old for the new. Easy.
Here's a helpful hint: Leave the 'item' tag attached to the scripture until you are ready to tie the two together otherwise you have to strain your brain to try to remember which clever item went with what awesome scripture. Learn from my experience.
I make mistakes so you don't have to!
THROAT LOSENGES "And thou shalt declare glad tidings, yea, publish it upon the mountains, and upon every high place, and among every people that thou shalt be permitted to see." Doctrine & Covenants 19:29
THE STORY: I have never talked so much EVER! At the end of the day my voice just hurt...
BEEF JERKEY / DRIED FRUITS / NUTS
"And again, verily I say unto you, all wholesome herbs God hath ordained for the constitution, nature, and use of man - Every herb [and] every fruit in the season thereof...yea, flesh also of beasts and of the fowls of the air, I, the Lord, have ordained for the use of man with thanksgiving..."
Doctrine & Covenants 89:10-12
THE STORY: You HAVE to stay healthy. It didn't take long for me to learn that I had to stay healthy if I was going to give my all to the work. You can't give what you don't have. Eat right, exercise, stay hydrated and get plenty of rest. It's all in the scriptures AND the white handbook.
KLEENEX / HANDKERCHIEF / ASPIRIN "And God shall wipe away all tears from their eyes; and their shall be no more death, neither sorrow, nor crying, neither shall there be any more pain." Revelation 21:4 THE STORY: I don't want to make you too sad or concerned for your missionary and I know that everyone is different but...let's just say that I cried myself to sleep my entire first month in the MTC. My companions and I went through lots and LOTS of Kleenex. Don't worry. It humbles you and makes your prayers amazing.
TUMS / ANTACID "Be strong and be of good courage; be not afraid, neither be thou dismayed: for the Lord thy God is with thee withersoever thou goest." Joshua 1:9 THE STORY: Before my mission I was really pretty shy around people I didn't know. I didn't like to do things that were out of my comfort zone. As you can imagine... nothing about a mission is IN anyone's comfort zone. It's all a little freaky at first. Knowing that God is on your side and that you are 'about His work' makes all the difference. The antacid will also help if they are in a foreign land eating foreign foods.
MOLESKIN / BANDAIDS "Therefore, gird up thy loins for the work. Let thy feet be shod also, for thou art chosen, and thy path lieth among the mountains, and among many nations." Doctrine & Covenants 112:7
THE STORY: Yup. We walked, and walked, and walked. My feet have never been the same. 'Nuf said.
GRANOLA BAR / PROTEIN BAR "But they that wait upon the Lord shall renew their strength; they shall mount up with wings as eagles; they shall run and not be weary; and they shall walk and not faint." Isaiah 40:31 THE STORY: Pretty much says it all. Great scripture, huh?
SLEEP MASK / MELATONIN "Come unto me, all ye that labor and are heavy laden, and I will give you rest." Matthew 11:28
THE STORY: Wow. That's a great scripture as well. Sleep. There is nothing so bad that it doesn't look better in the morning after a good night's sleep. (FYI: Melatonin is your sleep hormone that kicks in at night to help you fall asleep. You can buy supplements in the vitamin section of your grocery store or at a health food store.)
LOTION / FOOT CREAM "How beautiful upon the mountains are the feet of him that bringeth good tidings, that publisheth peace; that bringeth good tidings of good, that publisheth salvation; that saith unto Zion, Thy God reigneth!" Isaiah 52:7 THE STORY: Remember what I said about my feet? Yup. If your missionary has a problem with dry, cracked heels (Why does this seem to effect sister missionaries only?) get a foot cream that is high in Urea. You can find it on the internet. Mine is a prescription strength with 40% Urea. It's wonderful. If I was stranded on a desert island and could only take one thing this might even beat out the kiddos... especially if they are being feisty that day.
JOURNAL / STATIONERY / PENS "Write the things which thou hast seen, and the things which are, and the things which shall be." Revelation 1:19
THE STORY: My journal was my therapist. I wrote every single day. I needed lots of therapy.
HAND SANITIZER / SOAP "He that hath clean hands, and a pure heart; who hath not lifted up his soul unto vanity, nor sworn deceitfully, He shall receive the blessing from the Lord, and righteousness from the God of his salvation." Psalms 24:4-5
THE STORY: I like the small bottles that can hang on your backpack/purse. Handy. You can find cutsie ones for the sister missionary or just plain, old, functional ones for the guys. You never know when you're going to need it but you sure are grateful that you have it when you do!
FLASHLIGHT / HEADLAMP / NIGHT LIGHT "The path of the just is as the shining light, that shineth more and more unto the perfect day." Proverbs 4:18
THE STORY: I sent Matt a headlamp. He already had to have a flashlight. It was on the list of 'things to bring' - he's on a bike so I got a pretty good one. A night light would be pretty good as well for when they have to get up during the night in those unfamiliar apartments. Might save them from stubbing a toe. Gotta' save those FEET!
CANDY "...to the hungry soul every bitter thing is sweet." Proverbs 27:7 THE STORY: Yeah, this one needs NO explanation. What missionary doesn't love candy?
DR SHOLE'S INSOLES "For this is a great and the last commandment which I shall give unto you concerning this matter; for this shall suffice for thy daily walk, even unto the end of thy life." Doctrine & Covenants 19:32 THE STORY: Here's to the feet and to their everlasting comfort! Man, if your feet hurt there ain't nothin' right with the world.
CHOCOLATE / GOODIES "He hath filled the hungry with good things..." Luke 1:53 THE STORY: I so sent chocolate. There is nothing that chocolate can't cure. It's like a Band-Aid.
BLEMISH CREAM / SPOT REMOVER "That he might present it to himself a glorious church, not having spot, or wrinkle, or any such thing; but that it should be holy and without blemish." Ephesians 5:27
THE STORY: I sent a Tide Stick spot remover pen. Should help with those accidental spills that might happen...as long as they remember to carry it in their backpack.
CHAPSTICK / LIP BALM / LIP GLOSS "And thou must open thy mouth at all times, declaring my gospel with the sound of rejoicing." Doctrine & Covenants 28:16
THE STORY: Pretty self-explanatory. Make sure that your lip balm has a high SPF. There's nothing worse than sunburned lips. Can you say, "Instant Botox?"
BREATH MINTS "And speak freely to all; yea, preach, exhort, declare the truth, even with a loud voice, with a sound of rejoicing, crying - Hosanna, hosanna, blessed be the name of the Lord God!" Doctrine & Covenants 19:37
THE STORY: Pretty self-explanatory as well. Always grateful that you have them when you need them and wish you had them when you don't. If someone offers you a breath mint... you should never say, "No, thank you." Seriously.
MUSIC CD "For my soul delighteth in the song of the heart; yea, the song of the righteous is a prayer unto me and it shall be answered with a blessing upon their heads." Doctrine & Covenants 25:12
THE STORY: There is nothing that brings the spirit faster than music. Check with your mission to see what their rules are concerning music. We could only listen to instrumental or 'church' music on P-days. Mason could listen the same but any day of the week. Some don't allow music at all. If you can send music, you can't go wrong with The Mormon Tabernacle Choir or most anything that Deseret Book has to offer (except for maybe some of the 'rocked out' Primary CD's that are out there. Totally cool, but probably not missionary appropriate. Matt loves Country music so I sent The Work by the Nashville Tribute Band. It was Mason's favorite.
COMPASS / GPS "And from thence, whosoever I will shall go forth among all nations, and it shall be told them what they shall do; for I have a great work laid up in store, for Israel shall be saved, and I will lead them withersoever I will, and no power shall stay my hand." Doctrine & Covenants 38:33
THE STORY: GPS. Probably not too long before this is on the 'need to bring' list. Mason was in Ohio on a bike and he had to have one. Matt is in Seattle and his first email from the field said, "...I have to go buy a GPS..."
STAMPS / ENVELOPES "As cold waters to a thirsty soul, so is good news from a far country." Proverbs 25:25
THE STORY: It doesn't take a missionary long to learn that you have to write letters to get letters.
MONEY / GIFT CARD "Consider the lilies of the field, how they grow; they toil not, neither do they spin: And yet I say unto you, that even Solomon in all his glory was not arrayed like one of these. Take no thought, saying, What shall we eat? or, What shall we drink? or, Wherewithal shall we be clothed? For your heavenly father knoweth that ye have need of these things." Matthew 6:27-32 THE STORY: It's always fun to get a little surprise and to remember that the Lord is aware of their needs and will take care of His servants.
EARPLUGS / CALLOUS CREAM "Let your hearts be full, drawn out in prayer unto him continually for your welfare, and also for the welfare of those who are around you." Alma 34:27
THE STORY: Ok. This one definitely has a story behind it. When I was in the MTC... I had a really hard time. Chinese is HARD!...and I thought I could do it myself, and wasn't really relying on the Lord like I should...and He was trying to teach me something...sorry, that's a story for another day. Let's just say that I prayed a LOT. I started to do this 'thing' where I would plug my ears with my thumbs then put my hands over my eyes but on my forehead - kinda' like you're shading your eyes from the sun. Hard to explain and even harder to picture from that lame explanation I'm sure. I did it to block out distractions. My prayers were better and more focused if I couldn't hear or see anything else going on around me and there was ALWAYS stuff going on around me. Anyhow, the habit stuck and that is still how I pray. There are times when my kids walk into the bedroom at night when I'm saying my prayers so they've seen me plugging my ears and doing the hand thing. Well, that was a long story just to say that I sent earplugs and my son will get it but yours probably won't. Now you know the rest of the story. You could just send callous cream for their knees. Yup, you better hope they get callouses there.
So, there you have it. Your box will be pretty full with what I've listed but I'd love to hear any ideas that you come up with...along with the 'story' behind it. Everyone loves a good 'story.' Marcie, one of my mission companions said that I should send Romans 16:16 "Greet one another with an holy kiss..." and attach it to some Hershey Kisses. Funny! Yeah, I didn't send that one. Way funny though. Wow, I hope that every missionary comes home with at least one best friend like I did. Whatever would my life be like without Marcie. Love that girl. Story for another day...
Line your box with green tissue paper. Place some padding on the bottom i.e. shredded paper or something similar to protect the glass in your frame then just pile it all in and top with a letter. Neatly fold your tissue paper over the contents and then place the Pièce de résistance ...
Not every package needs to be full of things to eat does it? Bek received an awesome coupon from Bath & Body Works and while we were browsing my cute little Maren found these darling little hand sanitizer holders that can be hung from your purse or backpack. They had lots of different styles but Maren thought these frog princes would be perfect to put in a little package for St. Patrick's Day. We just tossed them in with a Bag of Gold Nuggets, some tissue, shredded paper and topped it off with a St. Patrick's Day printable. Everything fit perfectly into the small Flat Rate Box from the post office - you just can't beat $5 to mail a package. Don't forget the companions!
You can whip this little project up in a jiffy. I got this idea from my sister-in-law Cindy. She is planning a trip to Scotland, Ireland and England and for our first little "get excited for this trip" meeting (like we're not psyched already!) she gave us cute little bags of gold nuggets. I totally copied her idea for some of our St. Patrick's Day gift packages this year.
I wrote a note on the back and topped off my St. Patrick's Day packages this year with this 5 x 7 subway art printable. I got the original idea here and thought it would be easy to tweak and use for my second ever Photoshop project. Just Googled St. Patrick's Day and found words that I liked. Man...hope Photoshop gets faster eventually! Your missionary can hang it on their bulliton board...or wall...or fridge...or use it as a bookmark...or stick it in an inexpensive frame to help make their apartment more festive. This frame came from Ikea for $1.99 and comes in white or black and suits my boys just fine. However should my daughter decide to go...I may splurge and go with this little beauty for all of $4.99. Gorgeous! I'm sure that you could find something around the house or at one of the many dollar stores in your area. Download by clicking here.
My daughter Maren and I went to a Silver Beaver award ceremony for my dear friend, Janice last week and following the event we stopped in at Kneaders Bakery for a little treat. They had the most adorable shamrock sugar cookies ever! The next day after work I popped in to my very favorite little kitchen store, Gygi's in Salt Lake City and picked up my own shamrock cookie cutter and a decorating tip to pipe the edges of the cookies.
I should mention here that I don't actually like to make sugar cookies. They take a ton of time! You've got to make the dough. Chill the dough. Roll out the dough. Cut the dough. Cook the dough...repeat that whole process a gazillion times and then you have to get to frost them. Makes me tired just thinking about it. Yeah, we only make sugar cookies around here on Christmas Eve and that's only because it's Jeff's family tradition. At the end of this post I'll tell you about one of the best Christmas gifts I ever received.
Have I scared you away yet? Hang in there. It'll be worth it. Life changing in fact, like when I told you about frosting cupcakes. Yup, that good.
Normally...ok, the one and only time each year that I make sugar cookies, I frost them with the Best Ever Buttercream Frosting (really, that's the name). While it actually is the best ever and while it does set up ever so slightly I didn't think it would travel very well and the frosting would get smooshed in transit and why work so hard if they aren't going to look fantastic, right? With the help of the oh so kind employees at Kneaders they walked/talked me through the easiest way ever to frost sugar cookies. I looked up some recipes online and with my son Connorton as my official taste tester, we've got this all figured out for you.
Let's start with the sugar cookie recipe:
Nicole's Sugar Cookies
1/2 cup butter, has to be the real stuff
1/2 cup shortening
1 cup sugar
3 eggs
3 1/2 cup flour
1 tsp baking soda
2 tsp cream of tarter
1 1/2 tsp vanilla
Cream the butter and the shortening. Add the sugar and mix. Add the eggs and mix just until the eggs are blended in. Add the soda, cream of tarter and vanilla but mix just until blended - you don't want to over mix once the eggs are in. Add the flour. The recipe calls for 3 1/2 cups but you will need more than that. The key to keeping the cookies soft is adding enough flour. Add the 3 1/2 cups (one cup at a time and mixing after each addition), then use your fingers to determine how much more to add. It will be different every time you make them because your eggs will never be the same size. Pinch the dough. If it is sticky and you can pinch through it easily, you do not have enough flour. You want the dough to be soft, but not really sticky. You want to have some substance to it. Just keep adding 1/2 cup of flour, mix and pinch until it is just right. Chill the dough for at least 2 hours. Roll out to 1/4 to 1/2 inch thick. Cut into shapes and bake at 350 for 8 minutes. They are not going to look like they are done yet but take them out anyway. Be careful when transferring to rack or other cooling surface they will be really soft. As they cool they will become easier to handle.
Cool completely and frost.
This recipe is from my friend Nicole who knows that I don't like to make sugar cookies and knows that they are Jeff's favorite (his very favorite are Pumpkin Chocolate Chip...yeah, I don't make those either) so every time she makes a batch she shares with him. I have really great friends. Jeff's bookkeeper makes him Pumpkin cookies so don't feel too badly for him.
Tips & Tricks:
1. These are a few of my favorite cooking tools:
My rolling pin - I love it. It is long and has no handles. I have the other kind but I never, ever use them. I've had this one since I got married and my kids will probably fight over it when I'm gone. Never soak them in water. Just wipe them clean with a damp cloth. Mine is wood but they have a composite one at Gygi's that is very affordable.
Mini-spatula - I love these. Came from Gygi's, of course. They are very inexpensive - usually .99 - and are the perfect size for dishing up little desserts, cookies and bars - 2 1/4" wide. In this case I used it to help me lift the sugar cookies off the counter. Dip it in flour to prevent dough sticking.
Scraper - I use this tool all the time. It's a great tool for dividing dough and scraping clean your kitchen counter (see figure 3)
2. Dip your cookie cutter into flour in between each cutting and your dough will never stick to the cookie cutter. When lifting the cut cookie off the counter, dip your spatula into flour and press down on the counter while inserting under the dough. Dough will not become misshapen and will easily slide off spatula and onto the baking tray.
3. As I mentioned above: Clean up is made much easier with this handy little scraper. They have one similar to mine at Gygi's - usually .99. Scrape the flour and cookie dough gunk from the counter and sweep right into the garbage. Wipe counter down with a damp cloth and you're good to go.
Jeff always says: "Right tool for the right job." He's a smart man.
On to the frosting!
This is life-changing...
Vanilla Dipping Frosting
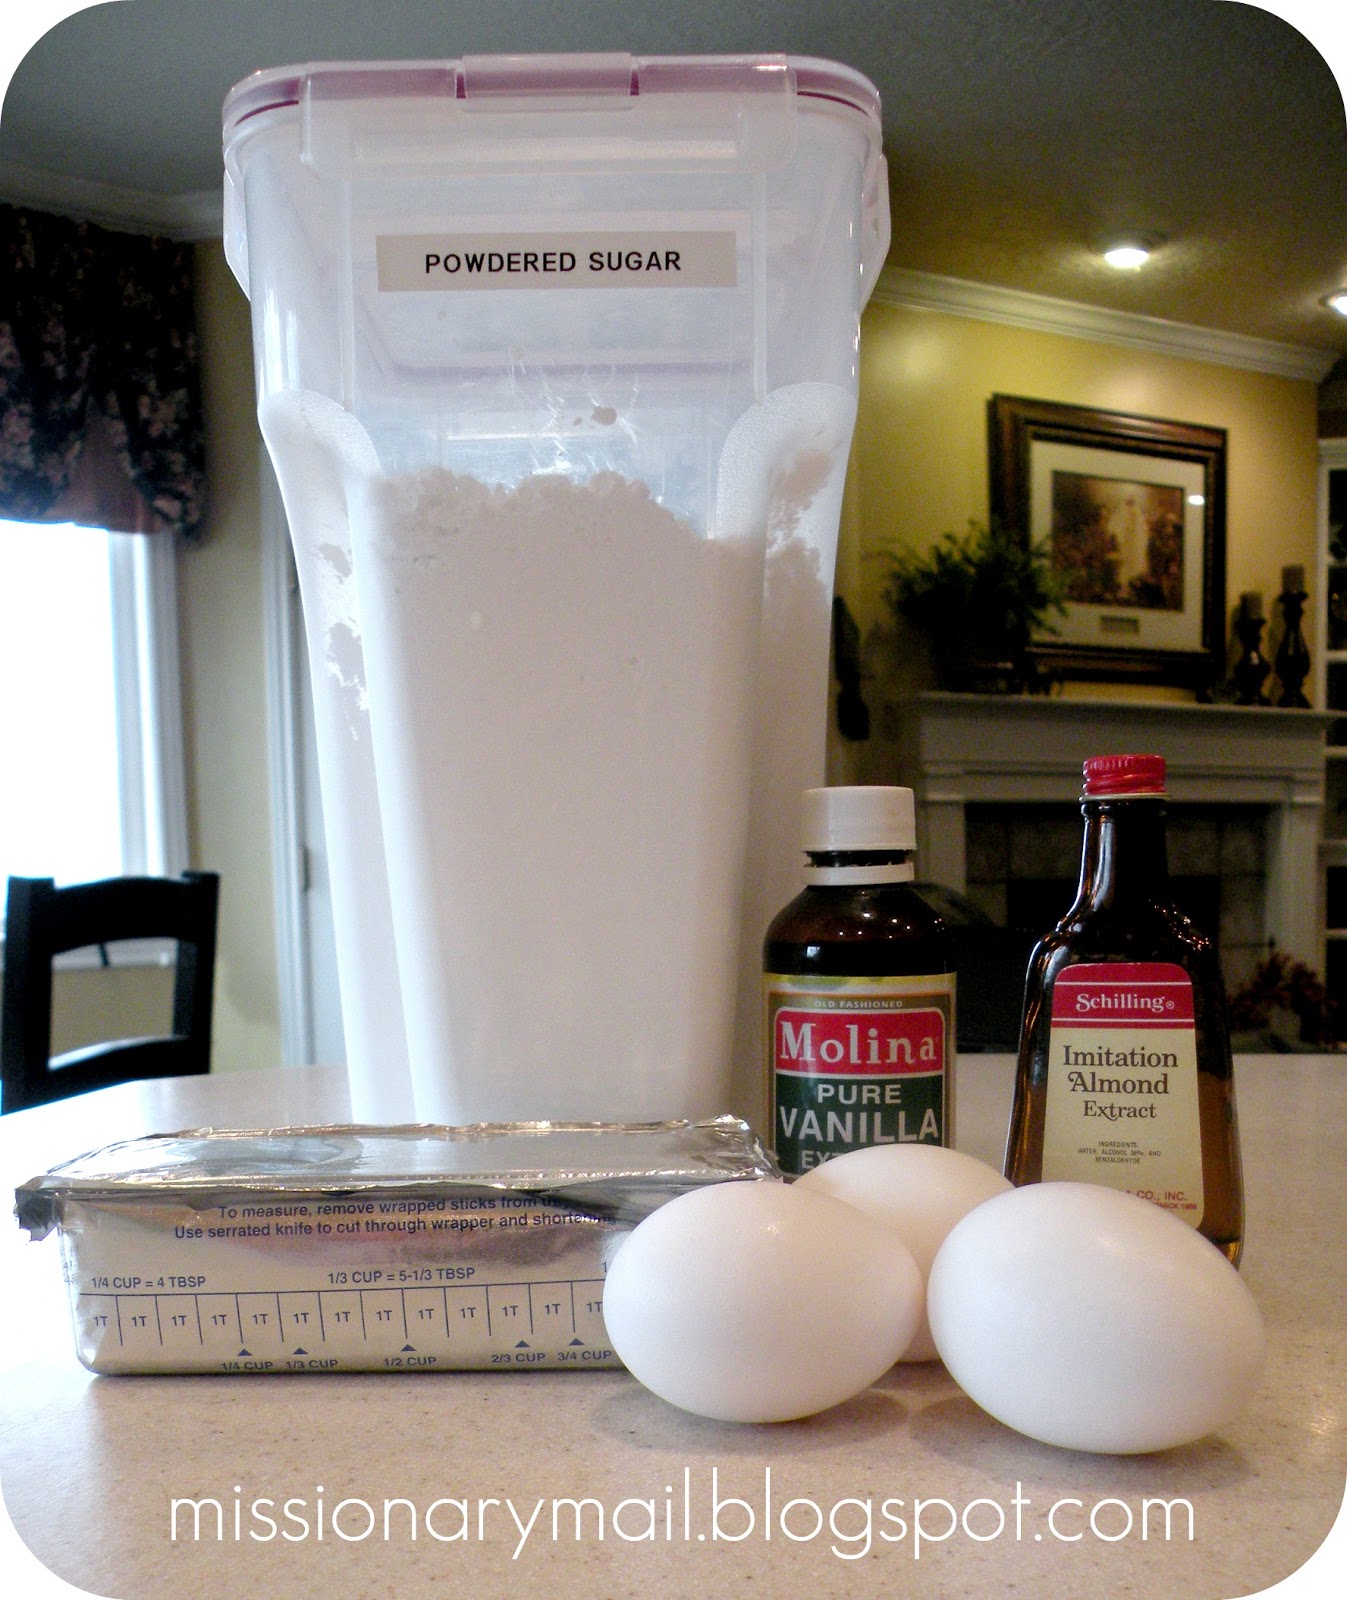
6 cups powdered sugar
1/2 cup water
2 Tbs light corn syrup
1 tsp vanilla
In a saucepan, combine powdered sugar, water and corn syrup. Cook over low heat, stirring constantly, until it reaches a temperature of 92 degrees F (33 degrees C). Mixture should be thin enough to pour, but thick enough to coat the cookie. Do NOT let the temperature get over 100 degrees F or the icing will not dry shiny. Dip the baked and cooled cookie in the icing. Lay the cookies out single until icing is dry. IF it does go above the 92 degrees F, do NOT throw it away. It just won't be shiny but it will still taste great. It's all good.
I used the Vanilla Dipping Frosting to frost the tops of the cookies. So FAST!! Just hold onto the sides of the cookie and dip the top into the frosting, lift the cookie up and let some of the excess drip off then flip it over onto a cookie sheet to dry. This frosting dries really quickly so I did find that I needed to give it a quick stir prior to dipping each cookie and once or twice I needed to turn the element back on and warm it back up slightly to keep it the consistency that I wanted. This will dry hard to the touch but not as hard as royal frosting and it won't break into bits when you bite into it. I was able to frost the entire batch of 48 cookies in just a matter of minutes with not much frosting left over. I just left the frosting white - mostly because it didn't even occur to me to add color to it but it would be totally darling to have it tinted a light green then pipe with a little darker green. Cute!
Now for the piping frosting...
Cutout Cookie Icing
3 egg whites, room temperature*
Whip for 2 minutes at fast speed until stiff
Add:
1/2 tsp almond extract
1 tsp vanilla
4 cups (1 lb) powdered sugar
Mix all together.
Add:
2 Tbs shortening
coloring, if desired
Mix on low speed until smooth. If you want to make a glaze from this,
just add a little hot water. This frosting dries firm to the touch but again it is not as hard as royal frosting. It's pretty and tasty and it dries very quickly so you can stack the cookies.
Keep the frosting stiff if you plan on using it for piping.
You can also use this to frost your cookies but it won't be as fast as the dipping frosting.
*Room temperature eggs: If you forget to get them out of the fridge in time for them to come to room temperature, just put them into a bowl of hot water for a few minutes.
Let's get piping!! This may look a bit intimidating if you've never done it before but it's really not bad at all. Just practice on a cookie or on a bit of parchment paper or wax paper...or a plate. You'll be fine. Promise.
First we need to load our bag with frosting:
I like to use a disposable pastry bag because I'm really pretty lazy about some things. You will need to fit your decorating tip into the bag to see where you need to snip the end off. Snip it off then insert your coupler inside, place the tip over the coupler but on the outside of the bag, screw the ring in place. Fold down the top of the bag ('cause we don't want to make too big of a mess).
Hold the bag with your hand (shown at left) and load frosting by the spoonful. Use the thumb that is holding the bag to scrape the frosting from the spoon. You can fill this pretty full just make sure that you leave enough head space so you can twist the top closed.
When you've loaded the frosting into the bag, fold the top back up and use your fingers to work the frosting down into the end of the bag (shown at left).
Twist the top and hold. You will keep your hand on this twist while decorating. Occasionally untwist and work the frosting down into the end again. Refill when necessary.
Cute!! I've included a little video clip of how I piped the frosting on. It really went pretty fast once I got the hang of it which didn't take too long. Let them dry completely then wrap them individually in syran wrap to insure freshness.
So, assuming that you're still with me...here's the story of one of the best Christmas gifts I've ever received. I work outside the home. It's only part time but that's how we support our missionaries and it is what it is and most of the time it works out pretty well but occasionally (sometimes more often than that) I get a little stressed...or a lot. This year I had to work on Christmas Eve. Yeah. Mom's don't have anything to do on Christmas Eve do they? I thought I was doing pretty well getting done early what could be done early but some things just can't be done too early. One of those things was making sugar cookies with the kids for them to leave out for Santa. Jeff's family tradition. Jeff and I work at the same place and late in the afternoon on Christmas Eve he called me into his office and presented me with a gift from Mike (one of the other accountants) and his wife Nicole. A beautifully decorated clear box - it was a Sugar Cookie Kit!!! Full of Nicole's fresh baked sugar cookies (recipe above), red and green frosting (yup, you guessed it...her Best Frosting Ever recipe) and cookie sprinkles. I cried. Seriously. The weight that that gesture took off my shoulders was incredible. I'm crying again just thinking about it. The best gifts come from the heart. Thanks, Nicole...and I hope that you don't mind that I just posted your two favorite recipes all over the internet! Oh, and here's her frosting recipe!
I wanted to have some kind of treat for those coming over to the house for Matt's 'Grand Opening' of his mission call so I came up with these yummy Grasshopper Cupcakes. I've never made the 'fancy' kind of cupcakes before but I wanted to come up with something that would not only taste great but look amazing as well...and, well...Matt has a pretty serious sweet tooth. While browsing at Orson Gygi's in Salt Lake City with my dear friend and former mission companion Marcie, I noticed a box of Andie's Mints. My imagination was sparked! I purchased a box of disposable pastry bags and the proper tip for the look that I wanted to achieve. Devil's Food cupcake with chocolate ganache (pronounced guh-nahsh), mint buttercream frosting topped with an Andie's Mint...oh my! They actually turned out to be very easy and now I'm kinda' hooked on the whole cupcake thing and thinking up other concoctions and combinations and trying to figure out just how I can send them through the mail without them arriving smooshed and not so pretty. I'll give it some serious thought and let you know when I've got it all figured out. Any ideas?
Follow directions on the packaged cake mix. When making the cupcakes, don't fill the baking cups as full as you normally would. Maybe only 2/3's full or less. I haven't made cupcakes in quite some time and forgot this essential step. Consequently, I had to make a lot more and my cupcakes don't look as pretty because you can see the actual cake rising above the wrapper. I had to make quite a few (about 70...remember all those nieces and nephews that I occasionally mention?) so remembering this little step would have saved me some precious time and money. Live and learn, right? While your cupcakes are cooling, make the chocolate Ganache.
Note: Sorry I forgot to take photos...whatever was I thinking?
Chocolate Ganache
8 oz. semi-sweet baking chocolate
(not chocolate chips)
1 cup whipping cream
2 tsp vanilla
powdered sugar, to taste
Break up the chocolate into a saucepan, add the cream, and stir over moderate heat until the chocolate has melted and the cream is almost at a simmer. Stir quite vigorously (I use a wire whisk) until the chocolate and cream have melded together into a smooth brown mass. Stir in the vanilla and powdered sugar to taste. Turn the chocolate into a mixing bowl; set bowl in a larger bowl of ice and whisk several minutes until the ganache has firmed to spreading consistency. May be made ahead, but don't bother to beat it over the ice; reheat to decongeal to proper consistency before using and then beat over ice if necessary. This should look like a thick, dark chocolate frosting.
Note: Ganache is French (gah-nahsh) and is a rich mixture of chocolate and cream
generally used for a frosting or filling.
When cupcakes have cooled completely, frost them with a layer of the chocolate ganache. This doesn't have to be piped on. Just frost using a butter knife or a small offset spatula. Doesn't have to be fancy. You will be covering it up with the Buttercream Frosting. (see above - definately not fancy)
Buttercream Frosting
1 cup butter
3 Tbs. milk
4 cups powdered sugar
flavoring to taste
green food coloring
Cream butter. Add milk and powdered sugar one cup at a time. Continue to add sugar until desired consistency. Make it a little thicker than you normally would as you will be adding flavoring and coloring and that will thin it down somewhat. You also want it to hold a really nice, stiff peak when piping onto the cupcakes.
Make the Buttercream frosting and...just a warning, you will need LOTS! One batch frosted almost a dozen cupcakes. It's on there pretty thick so if you just want to frost them like you usually do you could get by with one batch of frosting easy. On the other hand...they sure are fancy and a LOT faster to frost using the decorator tip and disposable bag shown above. If you're using the disposable bags you will need to purchase at least the 16 inch size. I got the 18 inch. That way each bag will hold an entire batch of Buttercream frosting and still allow room to twist the top and apply pressure without having the frosting squish out the top of the bag. Yeah, that would not be good. When it's time to refill your bag, just fold the top down again and refill as before; unfold the top, twist and squeeze frosting into your tip and you're good to go.
I used the largest open star tip that Gygi's had - Ateco #826 (they were out of the Wilton but you can click on the link to see what it looks like and find one comparable to use). You will NOT need a coupler for the extra large tip that I used. Just slide your tip inside your disposable pastry bag and note where the end needs to be clipped off. Take out the tip, cut the bag and reinsert tip and slide down until it's snug at the bottom. Fold down the top of the bag and holding with one hand, load your frosting inside. Unfold the top portion of the bag, twist and apply pressure until the frosting fills the decorative tip.
Figure #1:
Start at the outside edge of your cupcake
Figure #2:
Continue around the entire circumference
Figure #3:
When you are back at the beginning keep applying pressure and do a smaller circle on the inside
Figure #4:
Top with an Andie's Mint
Hmmm...I wonder what I would have made
had Marcie and her daughter not taken that cake decorating class?
This is similar to what we did for Mason last year and he loved it. It was really so simple and fun to do. Just wander the grocery store looking for all things green. The difficult part will be trying to make sure that you have a nice mix of healthy vs. treats. There are lots of green treats but no so many healthy ones that travel well. I also found a green bookmark, magnet and some CTR rings (for the kids on the Navajo Reservation where my parents are serving) at Deseret Book. We packaged everything up in a tissue lined Flat Rate box filled with some green shredded paper and topped it all off with a lovely 'Old Irish Blessing' verse. You can print the printable here.