
I discovered that there are a lot of busy ladies out there and a lot that don't feel too confident in their sewing/crafting skills. My sister, Katherine and I decided to come up with a simplified version that would require nothing but straight zigzag stitching - I think that's an oxymoron. It is so easy and with the two of us working together it only took us about three and a half hours to make four of them. It was probably a bit faster for us because we kind of tag-teamed it - I would pin and she would sew while I was pinning the next one. Jackie's is oh, so pretty and ours is cute. They both work great and our two missionaries certainly won't care. Here's what we did:
Materials Needed:
old white sheet or 1.5 yards white fabric for the background
(I used one sheet cut in half width-wise for each tree)
1.25 yards of green fabric for the tree
(this amount will do three trees, you could also turn your fabric the other way
and have a smaller tree which would use less fabric, see photos below)
.25 yard or a fat quarter of yellow fabric for the star
.25 yard or a fat quarter of brown fabric for the trunk
.25 yard of 2 coordinating fabrics for the two packages
(or you could just use the same fabric and have both packages match and just get .25 yard)
5 yards trim for the tinsel
1 yard coordinating ribbon for the two package bows
(.50 yards for each package)
coordinating thread
2 sticky back Velcro dots or squares
(for pocket closure - or you could use buttons and make button holes)
2 sticky back Velcro dots or squares
(for pocket closure - or you could use buttons and make button holes)
BACKGROUND: I used an old twin sheet cut in half. Cut off the top wide hem then fold the remaining fabric in half width-wise and cut. Give your cut sides a hem by pressing under one inch all along the side then fold the cut edge in to meet your pressed edge. Now you should have two pressed edges which you can fold together and then stitch. It's much easier to stitch after the hem has been pressed in. This is called a double half inch hem. You are essentially folding in, one half inch then folding again. Gives you a nice pretty hem that will sit nice and flat. You shouldn't need to hem the top and bottom of the sheet unless the factory hems aren't in good shape. My sister used white on white fabric for her background. It was so pretty. Her missionary is a girl. My missionary is a boy. He doesn't care, so I used what I had.
TRUNK: Cut a piece of brown fabric to measure 6"x 10". Lay your hemmed sheet on a flat surface and then place your tree on top. Make sure the right side is up! Place the star and the trunk in place and adjust so they are centered left to right and top to bottom. Pin your trunk in place then remove the tree and star. Using brown thread, sew around the outside edge of the trunk using a zigzag stitch. Your entire zigzag stitch should be on the edge of the fabric and not overlapping onto the white background. Hint: It is not necessary to have the same color thread in the bobbin. I used white on the entire project so that it matched the background when the project is viewed from the back.
TREE: Here are a couple of diagrams for cutting your tree. If you use 1.25 yards, you actually have enough fabric to cut out three trees. (see diagram #1) OR you could just purchase half a yard of unfolded fabric and use the entire width of the fabric for your tree. This gives you one slightly smaller tree but you won't have fabric left over. (see diagram #2)
.jpg)
diagram #1
%2Bview%2B2.jpg)
diagram #2
Lay your background on a flat surface and then place your tree on top centering the tree over the trunk. Place the star and make any adjustments so they are centered left to right and top to bottom. Remove star and pin the tree in place. Using green thread, sew around the outside edge using a zigzag stitch.
STAR: Jackie made a Star of David using two triangles. I just Googled 'country star' and clicked on images. I wanted it to be a bit funky. There are quite a few options but you'll have to weed through a few Brad Paisley's and Carrie Underwood's to find them. When you find the one you like just cut and paste it onto a document and make it into your desired size. Lay your project back on a flat surface, place your star and pin in place. Mine overlapped onto the tree a bit. Using yellow thread, sew around the outside edge using a zigzag stitch.
TRIM: Jackie used some RicRac that belonged to her grandmother and that's what I thought I would do as well...but...that stuff is hard to find (because it's so popular at the moment...somebody must have Pinned something really, really CUTE on Pinterest) and it's pretty pricey. I found some trim at the fabric store that I could buy by the yard. It is gold and kind of, I don't know...tinsely? It had a great price point at $1.09 a yard. You will need almost exactly 5 yards. I tried 'swagging' it like Jackie did but it didn't look great. I decided to just keep it geometric. Pin it in place and using coordinating thread, just zigzag right over it.
%2BPlacement%2BGuide.jpg)
PACKAGE(S): IF there was a difficult part of this project, this would be it. It's not rocket science though...just follow the step by step instructions, and IF I can explain it clearly, you will be just fine. Here goes:
%2Bpackage%2Binstructions.jpg)


%2BPlacement%2BGuide.jpg)
PACKAGE(S): IF there was a difficult part of this project, this would be it. It's not rocket science though...just follow the step by step instructions, and IF I can explain it clearly, you will be just fine. Here goes:
1. Cut two pieces of fabric measuring 7"x 21"
2. Using a pencil, lightly mark the fold lines on the wrong side of the fabric.
%2Bpackage%2Binstructions.jpg)
3. Fold and press 1/4" on the short sides of both packages making a small hem.
(see photo below)
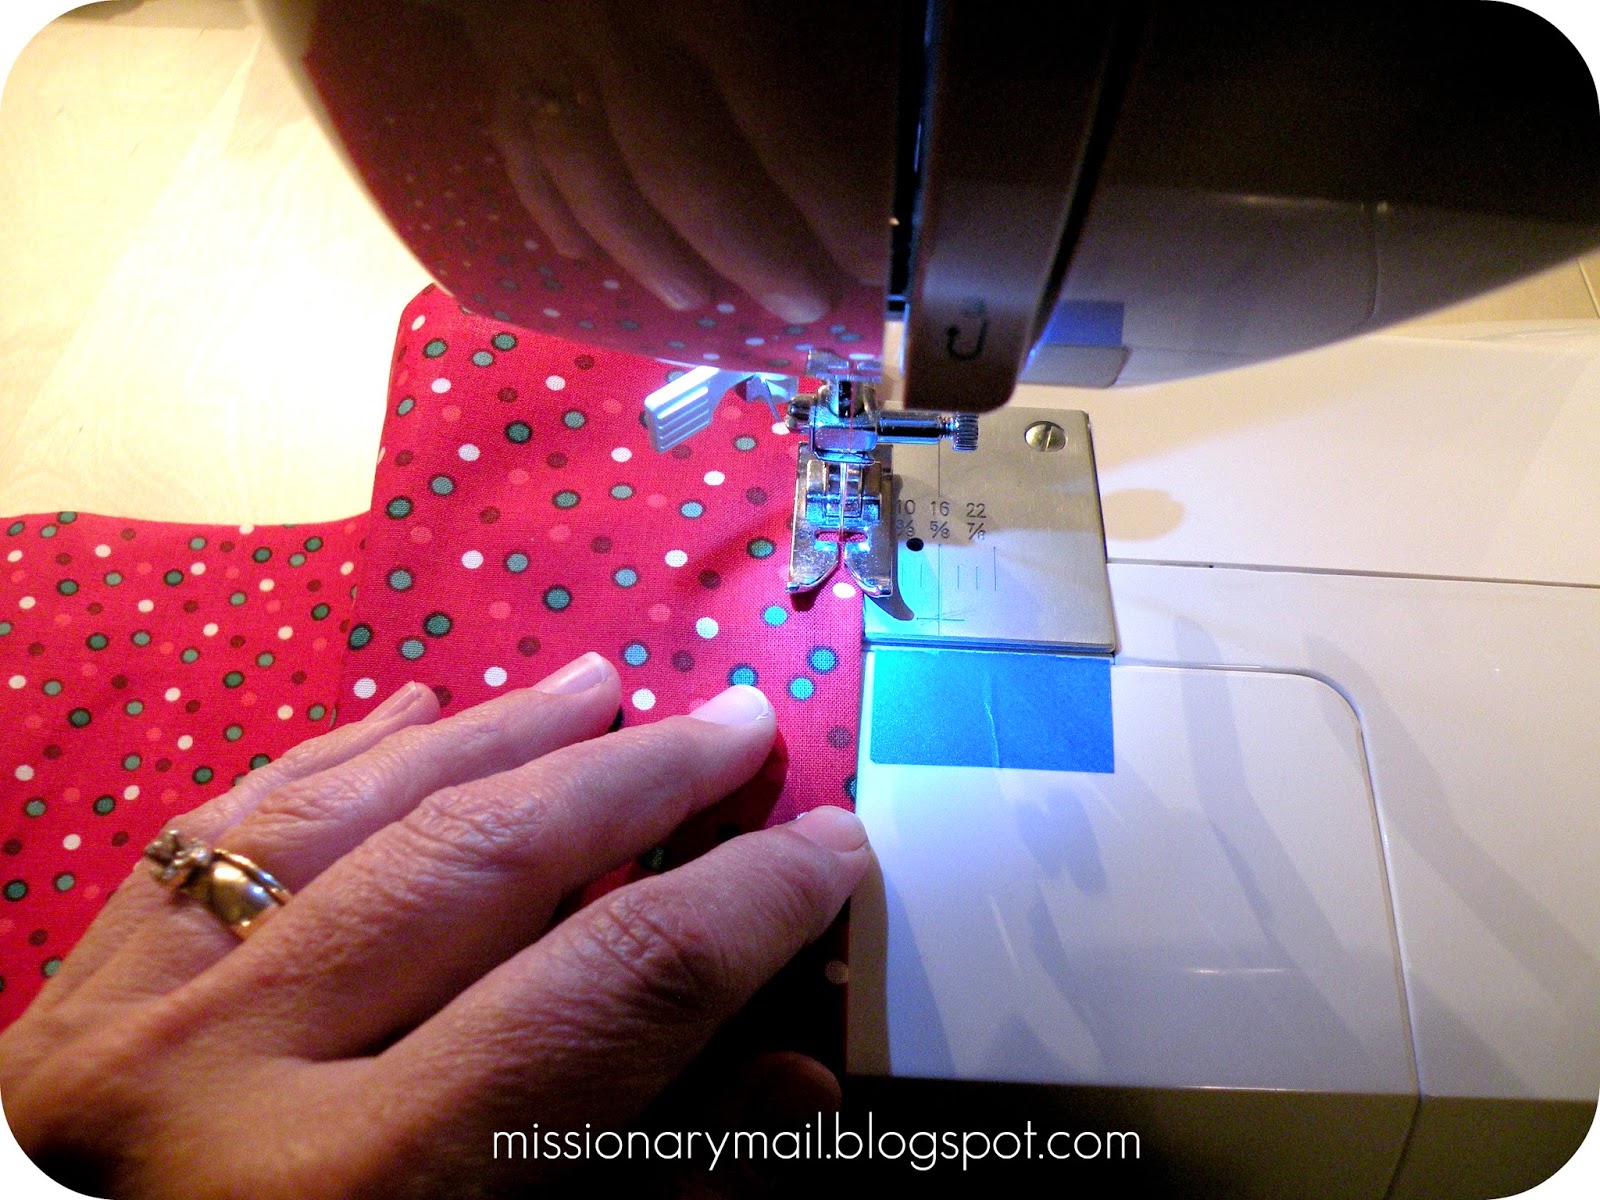
4. Using coordinating thread, stitch your pressed hem in place. I was too lazy to change my bobbin thread to match so I flipped my fabric over and stitched on the right side of the fabric so the white stitching didn't show. (see photo below)
5. With the right side of the fabric facing up, fold the left side over on the marked fold line.
6. Now fold the right side over on the marked fold line. Pin.
The two side hemmed edges should meet. (see photo below)
The two side hemmed edges should meet. (see photo below)
7. Stitch down both sides of both pockets using a 5/8" seam allowance.
(see photo below)

8. Turn right side out. Using a pair of scissors (closed), gently push the corners out. Be gentle, you don't want to cut through the fabric, you are just trying to make a nice point on your corner. Do this on all of the corners. Press.
(see photo below)


9. Fold the top (smaller fold) closed and press in place.
(see photo below)
10. Cut the yard of ribbon in half, giving you 1/2 yard for the bow on each pocket. Fold one piece of ribbon in half and press with your fingers just to mark the center. Place the center mark of the ribbon about one inch from the top of your pocket and pin in place. Make sure that you only pin through the pocket flap. Open pocket flap and sew in place as shown in the photos below.

11. Tie ribbon then trim the ends.
(see photo below)

12. With the flap closed, lift up on the front flap and center one half of the Velcro centered on the pocket. Repeat on the other pocket. (see photo below)
13. Now place the other half of the Velcro on top of the Velcro that you just adhered. This is MUCH easier than trying to center it on the top flap so they line up correctly. Close the top flap and press firmly. I tried to sew through the sticky back Velcro but the glue just gummed up my sewing machine needle. Just press firmly. The glue will take 24 hours to cure and then it's on there pretty good. (see photo below)


14. Lay your background on a flat surface and position the packages on either side of the tree. Remember to lift UP the top flap so you don't sew your package closed! Pin in place and sew using a zigzag stitch and coordinating thread. When you sew across the top of the pocket you will actually be sewing with the flap open. (see photos below)


That's it! You did it!
My daughter has a Silhouette Cameo vinyl cutter so I borrowed that and printed the scriptures onto heat transfer vinyl. If your daughter doesn't have one and you would like to use the scriptures in your project you can just write it on using a fabric marker. Don't forget to send a few push pins for them to use when hanging their tree.
The scriptures that I used were:
For unto you
is born this day
in the city of David,
a Savior,
which is Christ
the Lord.
Luke 2: 11
and
...and his name
shall be called
Wonderful,
Counsellor
The Mighty God,
The everlasting Father,
The Prince of Peace.
Isaiah 9:6
I cut out a bajillion ornament shapes at my local craft store using my own paper and their die cut machine. Our family will work on their ornaments this weekend and I will put the ornaments in the pockets along with some mini gold safety pins. At our family gathering this Thanksgiving everyone will have a chance to decorate their ornament and write notes to our family missionaries. The ornaments will be mailed randomly during the Christmas season in each family's Christmas card. For an idea on how to do that, click here.
I made one for my son on his Mission. It turned out beautiful! At the bottom with the two present pockets, I added two larger presents (that were just for looks) to give a more plentiful look under the tree. Thank you for sharing.
ReplyDeleteWhat a great idea!! So glad that it worked out so well for you. I'm sure your missionary LOVED it!
ReplyDeleteCherylann